a quick step by step guide showing you how our Diablo Kit was painted for our promo pictures..


Step 1 – basecoats.
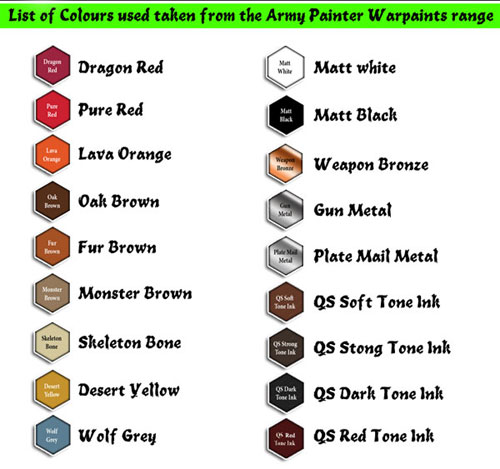
Skin – dragon red
Legs / fur – oak brown
Hoofs / loincloth / bones/ sword handle – monster brown
Sword – gun metal
Wristbands – weapon bronze
Rock – wolf grey
Base – fur brown

Step 2 – Washes.
Apply soft tone to cloth, hooves and metal.
Apply strong tone to the legs.
Apply red tone to the skin.
To finnish dark tone was applied to some of the deeper recesses of the mini & to the base..

Step 3 – highlights.
The skin is highlighted with dragon red.
The legs are dry brushed with oak Brown.
The loins are highlighted with monster brown.

Step 4 – 2nd highlights.
The skin is further highlighted with pure red.
Skeleton bone was used to very lightly dry brushed / highlight the loins and hooves and then heavily highlighted on the bones.
The legs are dry brushed with Desert yellow then highlighted with skeleton bone.

Step 5 – Final details.
The Veins and facial features highlighted lava orange.
The Sword is dry brushed plate mail metal.
Matt black and white was used for the eyes.
Claws & teeth painted matt white, bones also highlighted matt white.
Matt black for the horns.
Soft tone and dark tone were applied to any recesses/details needing more dark shade
The rock on the base is dry brushed matt white and the rest of the base is dry brushed with monster brown to finnish..

For the final stage some battlefield – highland tuffs were added.. Anti-shine Matt varnish spray was used on the whole model and once dry the horns were given a coat of gloss varnish..
