a quick step by step guide showing you how our Torok Kit was painted for our promo pictures..
![]()

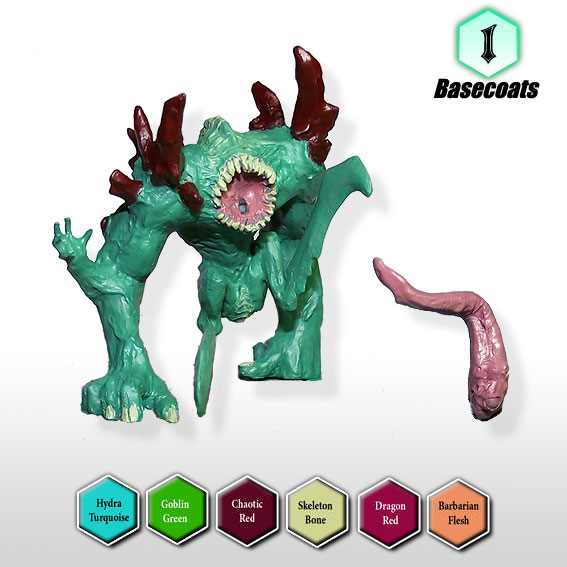
Step 1 – basecoats.
Skin – turquoise & goblin green 1:1 ratio [1 part turquoise to 1 part goblin green]
Horns – chaotic red
Teeth / Claws – skeleton bone
Tongue – 5:1 barbarian flesh & dragon red
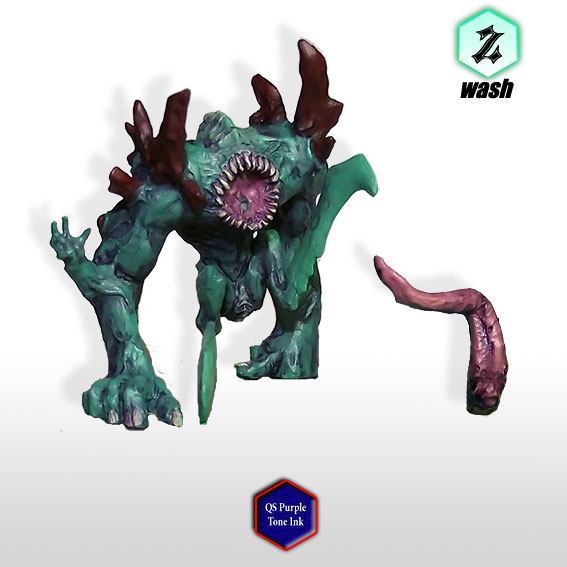
Step 2 – Washes.
purple tone ink watered down at a 1:1 ratio, apply to the whole mini.
a second coat of purple tone was applied to some of the deeper recesses of the mini..
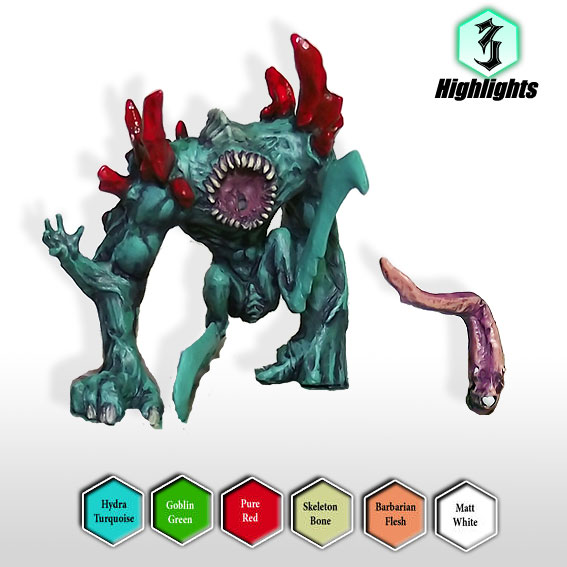
Step 3 – highlights.
The skin is highlighted with turquoise & goblin green 1:1 ratio
The horns are highlighted with pure red
The teeth/claws are highlighted with skeleton bone. The spine is also given a light watered down highlight of skeleton bone
The tongue is highlighted with barbarian flesh and the eyes are painted matt white.

Step 4 – final highlights.
The skin is further highlighted with the 1:1 mix of turquoise & goblin green which is lightened up with a mix of 5 parts mixed colour to 1 part matt white.. the bottom blades are given a further highlight by adding another drop of white which is applied along the edge of the tips.
The horns are given a second highlight with equal parts 1:1 pure red & lava orange to the raised edges before being given a final highlight of lava orange to the tips of the horns
The tongue is given a final highlight of barbarian flesh and matt white 1:1 on the tip & along the middle, to finnish a black pupil is added to the main eye.

For the final stage 2 thin coats of Anti-shine Matt varnish spray was used on the whole model.